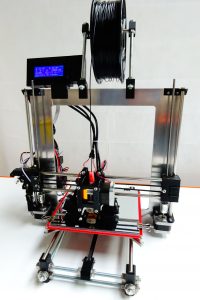

I’ve not written an article in a while because of 3d printers! An amazingly absorbing and interesting hobby that should only be undertaken if you have the time… It all began one rainy day, when a friend and I happened to discuss 3d printers, rather rashly I offered to build one for him (hey I enjoy these sorts of challenges) as he didn’t really have the confidence in his assembly skills. So we looked on a certain auction site and we were both amazed to discover a number of vendors selling kits for under £150, at that price even if we were really unhappy with the printer and it basically didn’t work – we’d have still learnt a lot about 3d printers and he’d have a lot of interesting vitamins for his junk draw… The kit was derived from the Prusa i3 design with corners cut, the first thing to note was the frame was made out of plywood, now plywood can be a fantastic material, strong, robust and very rigid, unless of course its made out of the worlds softest wood. Great care had to be take during assembly as even a nut with washer would very easily cut through the wood, meaning every nut and bolt was almost loose. This particularly impacted the Y axis where its rigidity to the rest of the frame is vital, if you want right angles which are, well, you know, 90 degrees. Particularly unhelpful was the very badly translated “manual” with wiring diagrams and text that didn’t even match up, I had to use the internet extensively to figure out the wiring. Long story short, we managed to get some decent prints out of it and I ended up buying it off my mate for a nominal amount. Every print was a continuous set of checking and adjusting you could get results out of it but you really had to ride it all the way. Given the nature of the frame I decided that this printer really wasn’t worth spending any extra money on (a sows ear does not a silk purse make…) I came to a number of conclusions

I managed to find a UK supplier Factory 3D who makes a very nice metal framed kit and who’s support is both knowledgable and rapid, two vital ingredients often missing, especially in kit form products.
The first obvious difference between the printers after assembly, was the noise from the motors or rather carriage movement, the Chinese printer needed to go slower and made a whole lot more noise. Obviously if a mechanism is making noise its using extra energy and causing more vibration to do this, neither of which are good things.Regarding the noise, one minor let down of the new printer is the noise from the feeder fan, but this is really nothing and after taking advice, this may be something that I choose to modify either with a different brand of fan or possibly a simple circuit to reduce the fan speed, the feeder heat sink like the stepper motors are basically cold even after several hours of printing. Having something decent as a base its worth adding to or modifying to suit your specific needs.
The only stepper with a faint bit of heat is the extruder motor but it is to be expected and could be safely much warmer, but the extruder – what a joy… its so much better than the other machine and I have been able to reduce my print temperature by a massive 40oc which is just fantastic, that added to the fact the actual nozzle isn’t held in a single useless microscopic grub screw is a massive help.
While the price of a quality kit is almost double, I am without doubt left feeling that the new printer provides way more than double the value.
Sometimes you really do get what you pay for….
For the next post I plan to introduce OpenSCAD for 3d printing – as I’m so impressed by how easy it makes creating a 3d design that can be printed...