As you are no doubt aware, a mouse is a powerful and very useful input device, even on my TV box I use a mouse (where you can even use a virtual keyboard with the mouse if needed), but spare a though for a moment for those of us that for whatever reason can't easily physically manipulate a mouse...
Having a relative in this unenviable position, it occurred to me that there should be some kind of USB mouse out there that is controlled either with large easy to handle buttons, or even a decent sized joystick. Boy was I in for a nasty shock when I discovered the prices that some companies are asking for such a simple device (frankly they should be ashamed!)
Having determined to make such a device myself, I decided a really important goal was that it should be as simple as possible to use, ideally just plug it in and it works, no messing with special software running in the background, or drivers that might later be out of date etc.
USB is definitely the way to go here, all modern operating systems supporting USB devices have at the very least built in USB mouse and keyboard drivers as after all they are part of the USB human interface device class (USB HID)
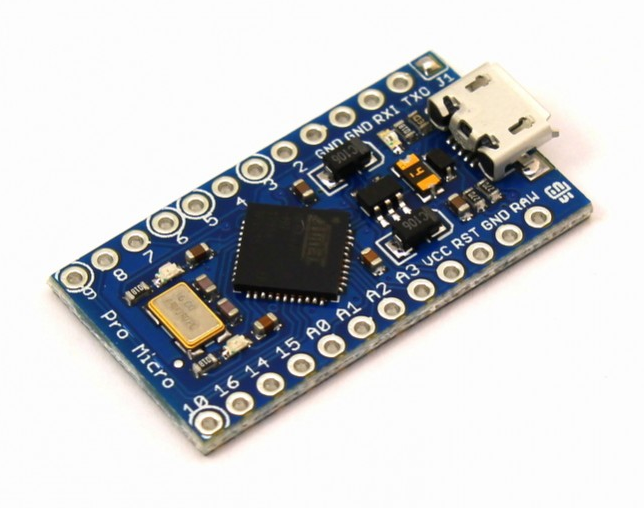
Enter an old friend the Arduino Pro Micro, being based on the ATmega32U4 this board departs from the usual design of an Arduino as the micro controller has built in USB support, rather than rely on an extra USB to serial chip. The big advantage here is that the controller can be programmed to behave just like any other USB HID device, as the chip itself is in direct communication with your host machine.
There are some great examples with the Arduino SDK for using the Pro Micro as a mouse, and as in this case I decided to use a digital joystick (for ease of use) this makes this project ideal for the beginner to Arduinos, all the input devices are simple digital inputs and for the code, it's just a case of modifying an example code base.
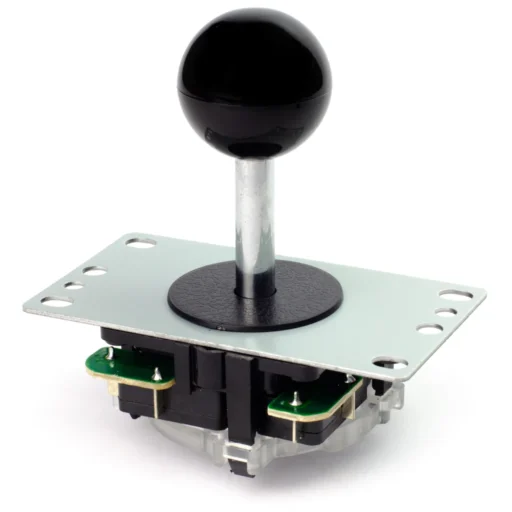
A big boon for this project was realising that the buttons and joysticks that are nice and big and super robust are those that are designed for arcade machines, there are loads of component vendors catering to people making their own arcade machine (often with a Rasperry PI running a retro emulator)
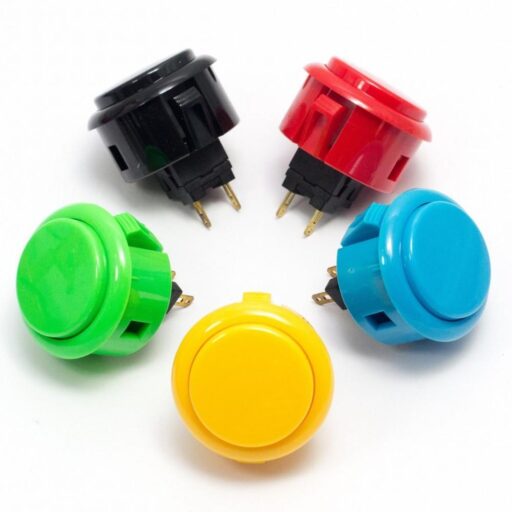
Having selected a decent joystick with robust metal shaft, and buttons that looked like they can withstand almost any kind of abuse I was more than ready to wire everything up and start tweaking the software.
While initially I'd thought of adding a small display and having some special mode where settings could be changed in the end I decided that this could potentially make things far more complicated that they need be, not just in the implementation but also for the end user.
I wired up each of the four microswitches in the joystick and two buttons between an input and ground, as you will see from the code the these inputs have their internal pull up resistors enabled, this means when the switch is open (not pressed) it will read as a value of 1 and when the button is closed (pressed) it will connect the pin to ground and so read as a value of 0.
#include <Mouse.h>

#define BL 15
#define BR 16

#define UP 7
#define DN 6
#define RT 8
#define LT 9

void setup() {
  // put your setup code here, to run once:

  pinMode(BL, INPUT_PULLUP);
  pinMode(BR, INPUT_PULLUP);

  pinMode(UP, INPUT_PULLUP);
  pinMode(DN, INPUT_PULLUP);
  pinMode(RT, INPUT_PULLUP);
  pinMode(LT, INPUT_PULLUP);

  Mouse.begin();
}

int mstate = 0;
int lastMstate = 0;
float accel = 0;
int tick=0;

int lastLbut = 0;
int lBut = 0;

int lastRbut = 0;
int rBut = 0;

void loop() {
  // put your main code here, to run repeatedly:

  lastMstate = mstate;
  mstate = digitalRead(UP) + (digitalRead(DN) << 1) + (digitalRead(RT) << 2) + (digitalRead(LT) << 3);

  if (mstate == 15) accel = 1;
  if (mstate != 15) {
    tick++;
    if (tick>3) {
      accel +=0.1;
      if (accel > 8) accel = 8;
      tick = 0;
    }
    int mx = 0, my = 0;
    if (!(mstate & 1)) my = -(int)accel;
    if (!(mstate & 2)) my = (int)accel;
    if (!(mstate & 4)) mx = (int)accel;
    if (!(mstate & 8)) mx = -(int)accel;
    Mouse.move(mx, my, 0);

  }

  lastLbut = lBut;
  lBut = !digitalRead(BL);
  if (lastLbut != lBut) {
    if (lBut) {
      Mouse.press(MOUSE_LEFT);
    } else {
      Mouse.release(MOUSE_LEFT);
    }
  }


  lastRbut = rBut;
  rBut = !digitalRead(BR);
  if (lastRbut != rBut) {
    if (rBut) {
      Mouse.press(MOUSE_RIGHT);
    } else {
      Mouse.release(MOUSE_RIGHT);
    }
  }
  delay(10);
}
You might notice that there is some movement acceleration here, basically once the mouse starts moving after a short delay it will move faster, this allows very accurate small movement just by nudging the mouse, or larger movements from one side of the screen to another it the joystick is continuously held in a particular direction.
The previous state of the mouse buttons are also tracked, as we need to be able to send mouse button events only when the button state changes.
Once I had the hardware up and running, it was then a matter of putting it all in a case of some kind, my father is very much more into woodworking and so I sought his advice as I wanted the case to be mounted on something heavy weight so the whole device would be much less likely to move about.
I'll leave the final words to my relative
It's wonderful for people like me that have little use of their hands to be able to master a joystick